
2 years ago I had an ambitious idea. Weave enough fabric to make a travel bag set for myself. These bags will be for weekend trips, I certainly wouldn’t allow any baggage handler near these beauties.
But before physically starting the project I had to sit down and design on paper (following up on the computer) and do all the math calculations for how much I would need for the warp and weft. For those not familiar with weaving, the warp is the “vertical” threads that are placed on the loom from front to back and the “weft” is what you place side to side. Typically you use more materials (yarns) for the warp than the weft.
Anyway, back to calculations, which is made easier by Microsoft Excel. Spreadsheets can take the screw-ups out of calculations (as long as you don’t have errors in your formulas!) and make life a lot easier. So I took my blank “Project File” where I have all my formulas entered and made a copy so I could work on the new travel bag project.
Pretty exciting looking isn’t it?

This is only one page of the spreadsheet, there are 2 others but I won’t make your eyes glaze over by detailing them.
After all the calculations were done, I needed to wind the lengths needed for the warp as well the ones to be dyed. I was using commercially dyed cotton yarn for the bulk of the warp, but 3 light purple-y shades (centre wide stripe and the same shade on either side) were going to be space dyed. Dyeing yarns are a fun way of exploring and playing with colour. There are 2 different dye types though as one is suitable for plant based fibres (cotton, linen, etc.) and the other type is for protein fibres (wool, silk, alpaca, etc.) I had picked up some packages of Dylon fabric dyes at JoAnn Fabrics in the U.S. (1/3rd the price than here in Canada) and arranged a dye day with my northern homestead neighbor Kathy.
We set up a couple long tables outside at her place, lined them with heavy plastic and got to work “painting” our yarns. I neglected to get a photo at this stage, probably because I was wearing rubber gloves as well as up to my elbows in colourful dyes. But I did get a pic of them hanging to dry inside the homestead on my vintage wall drying rack.
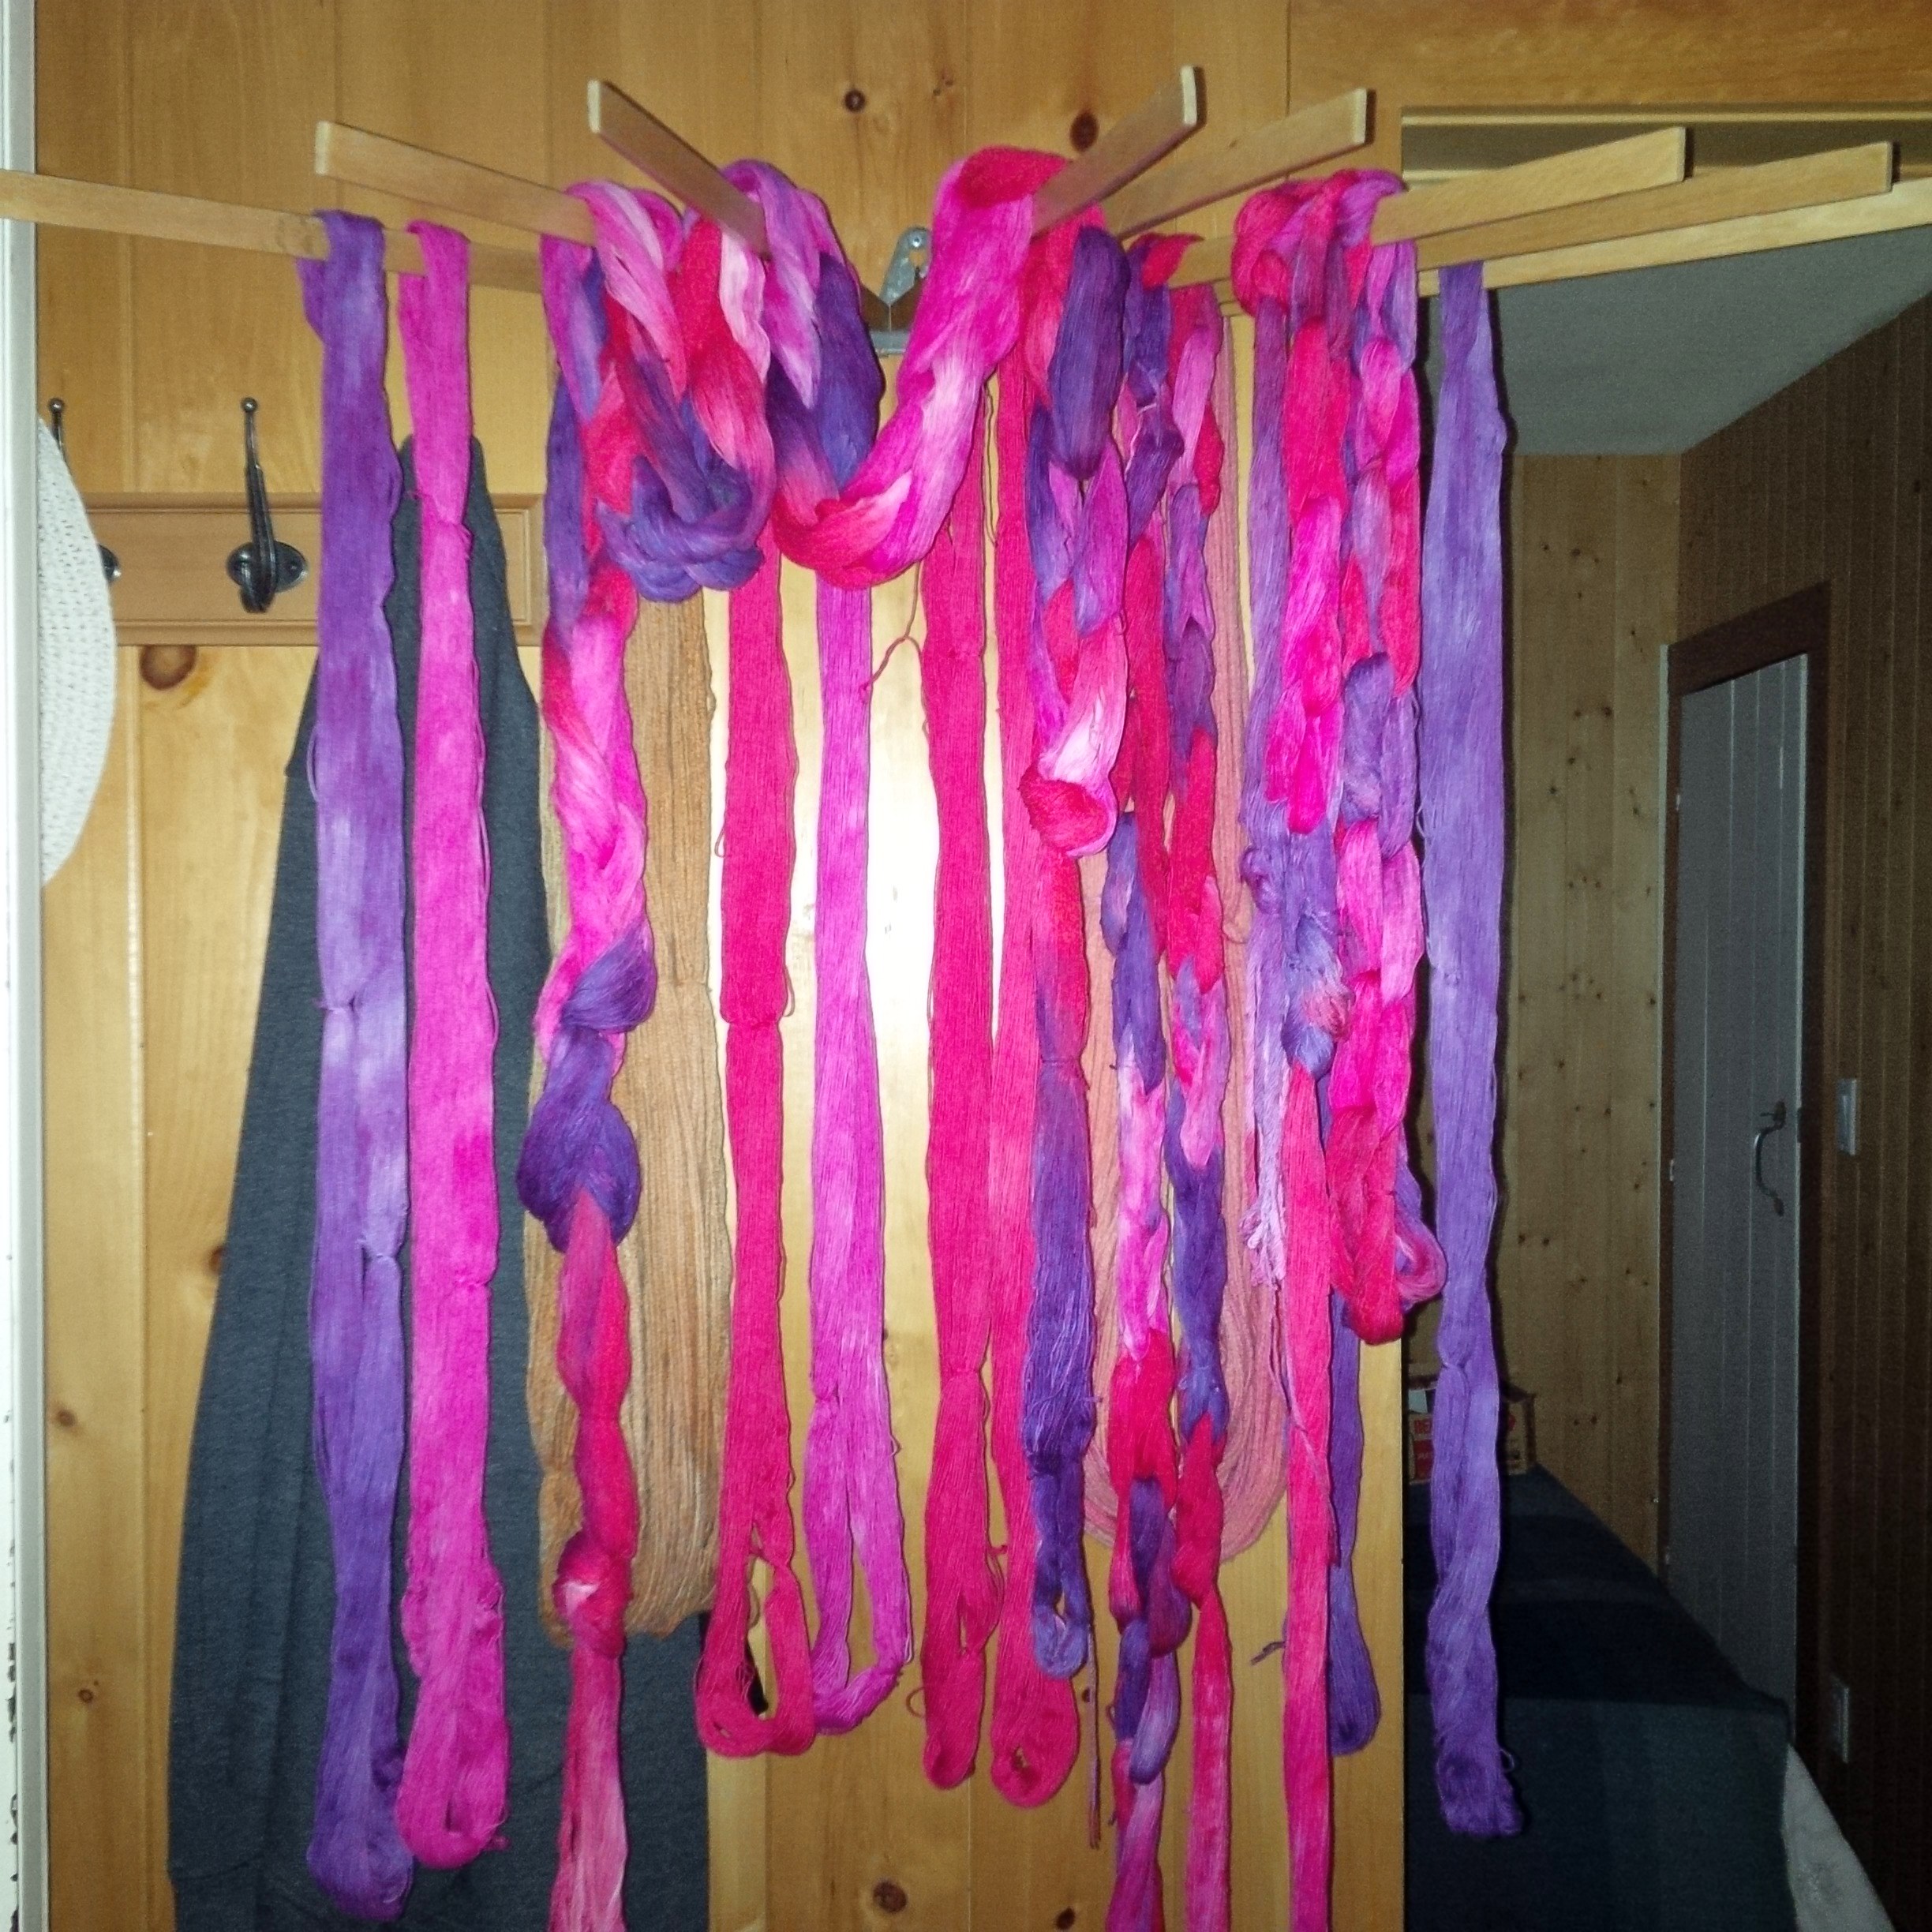
BTW, this rack is perfect for drying yarns, make sure they have dripped off outside though otherwise you make a mess of your flooring.
Once the yarns were done and dried, it was time to get them ready to go on the loom.
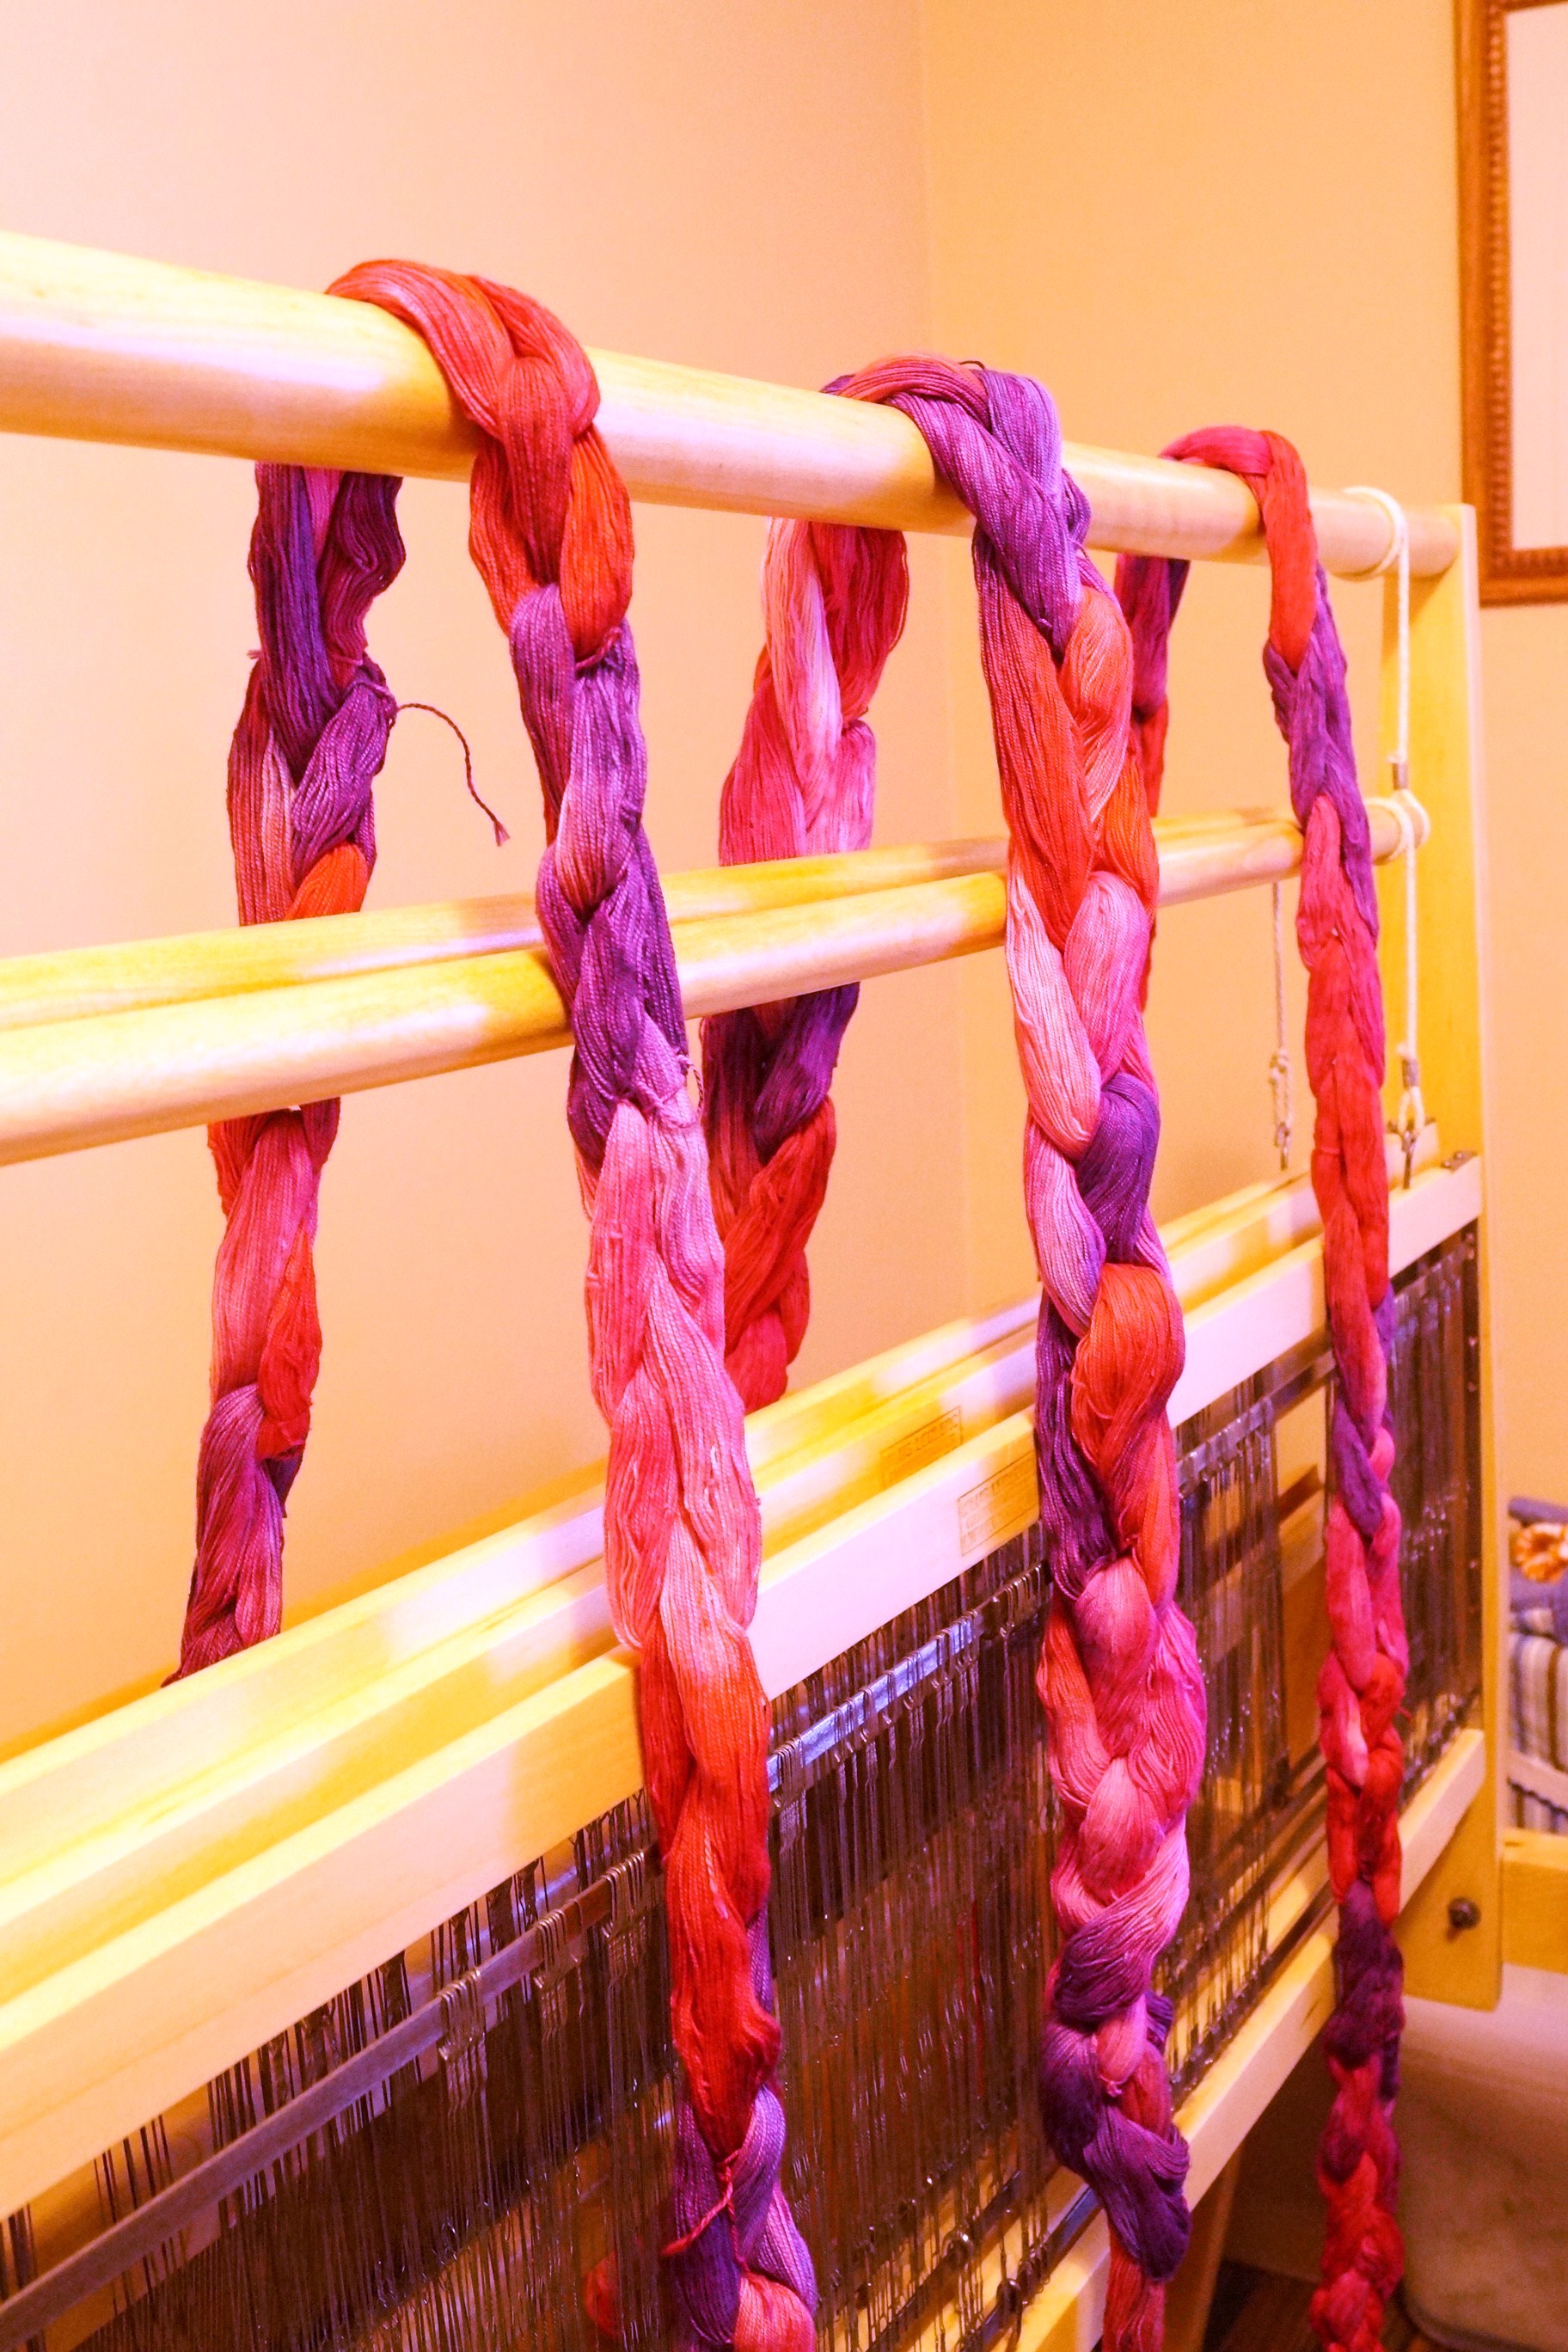
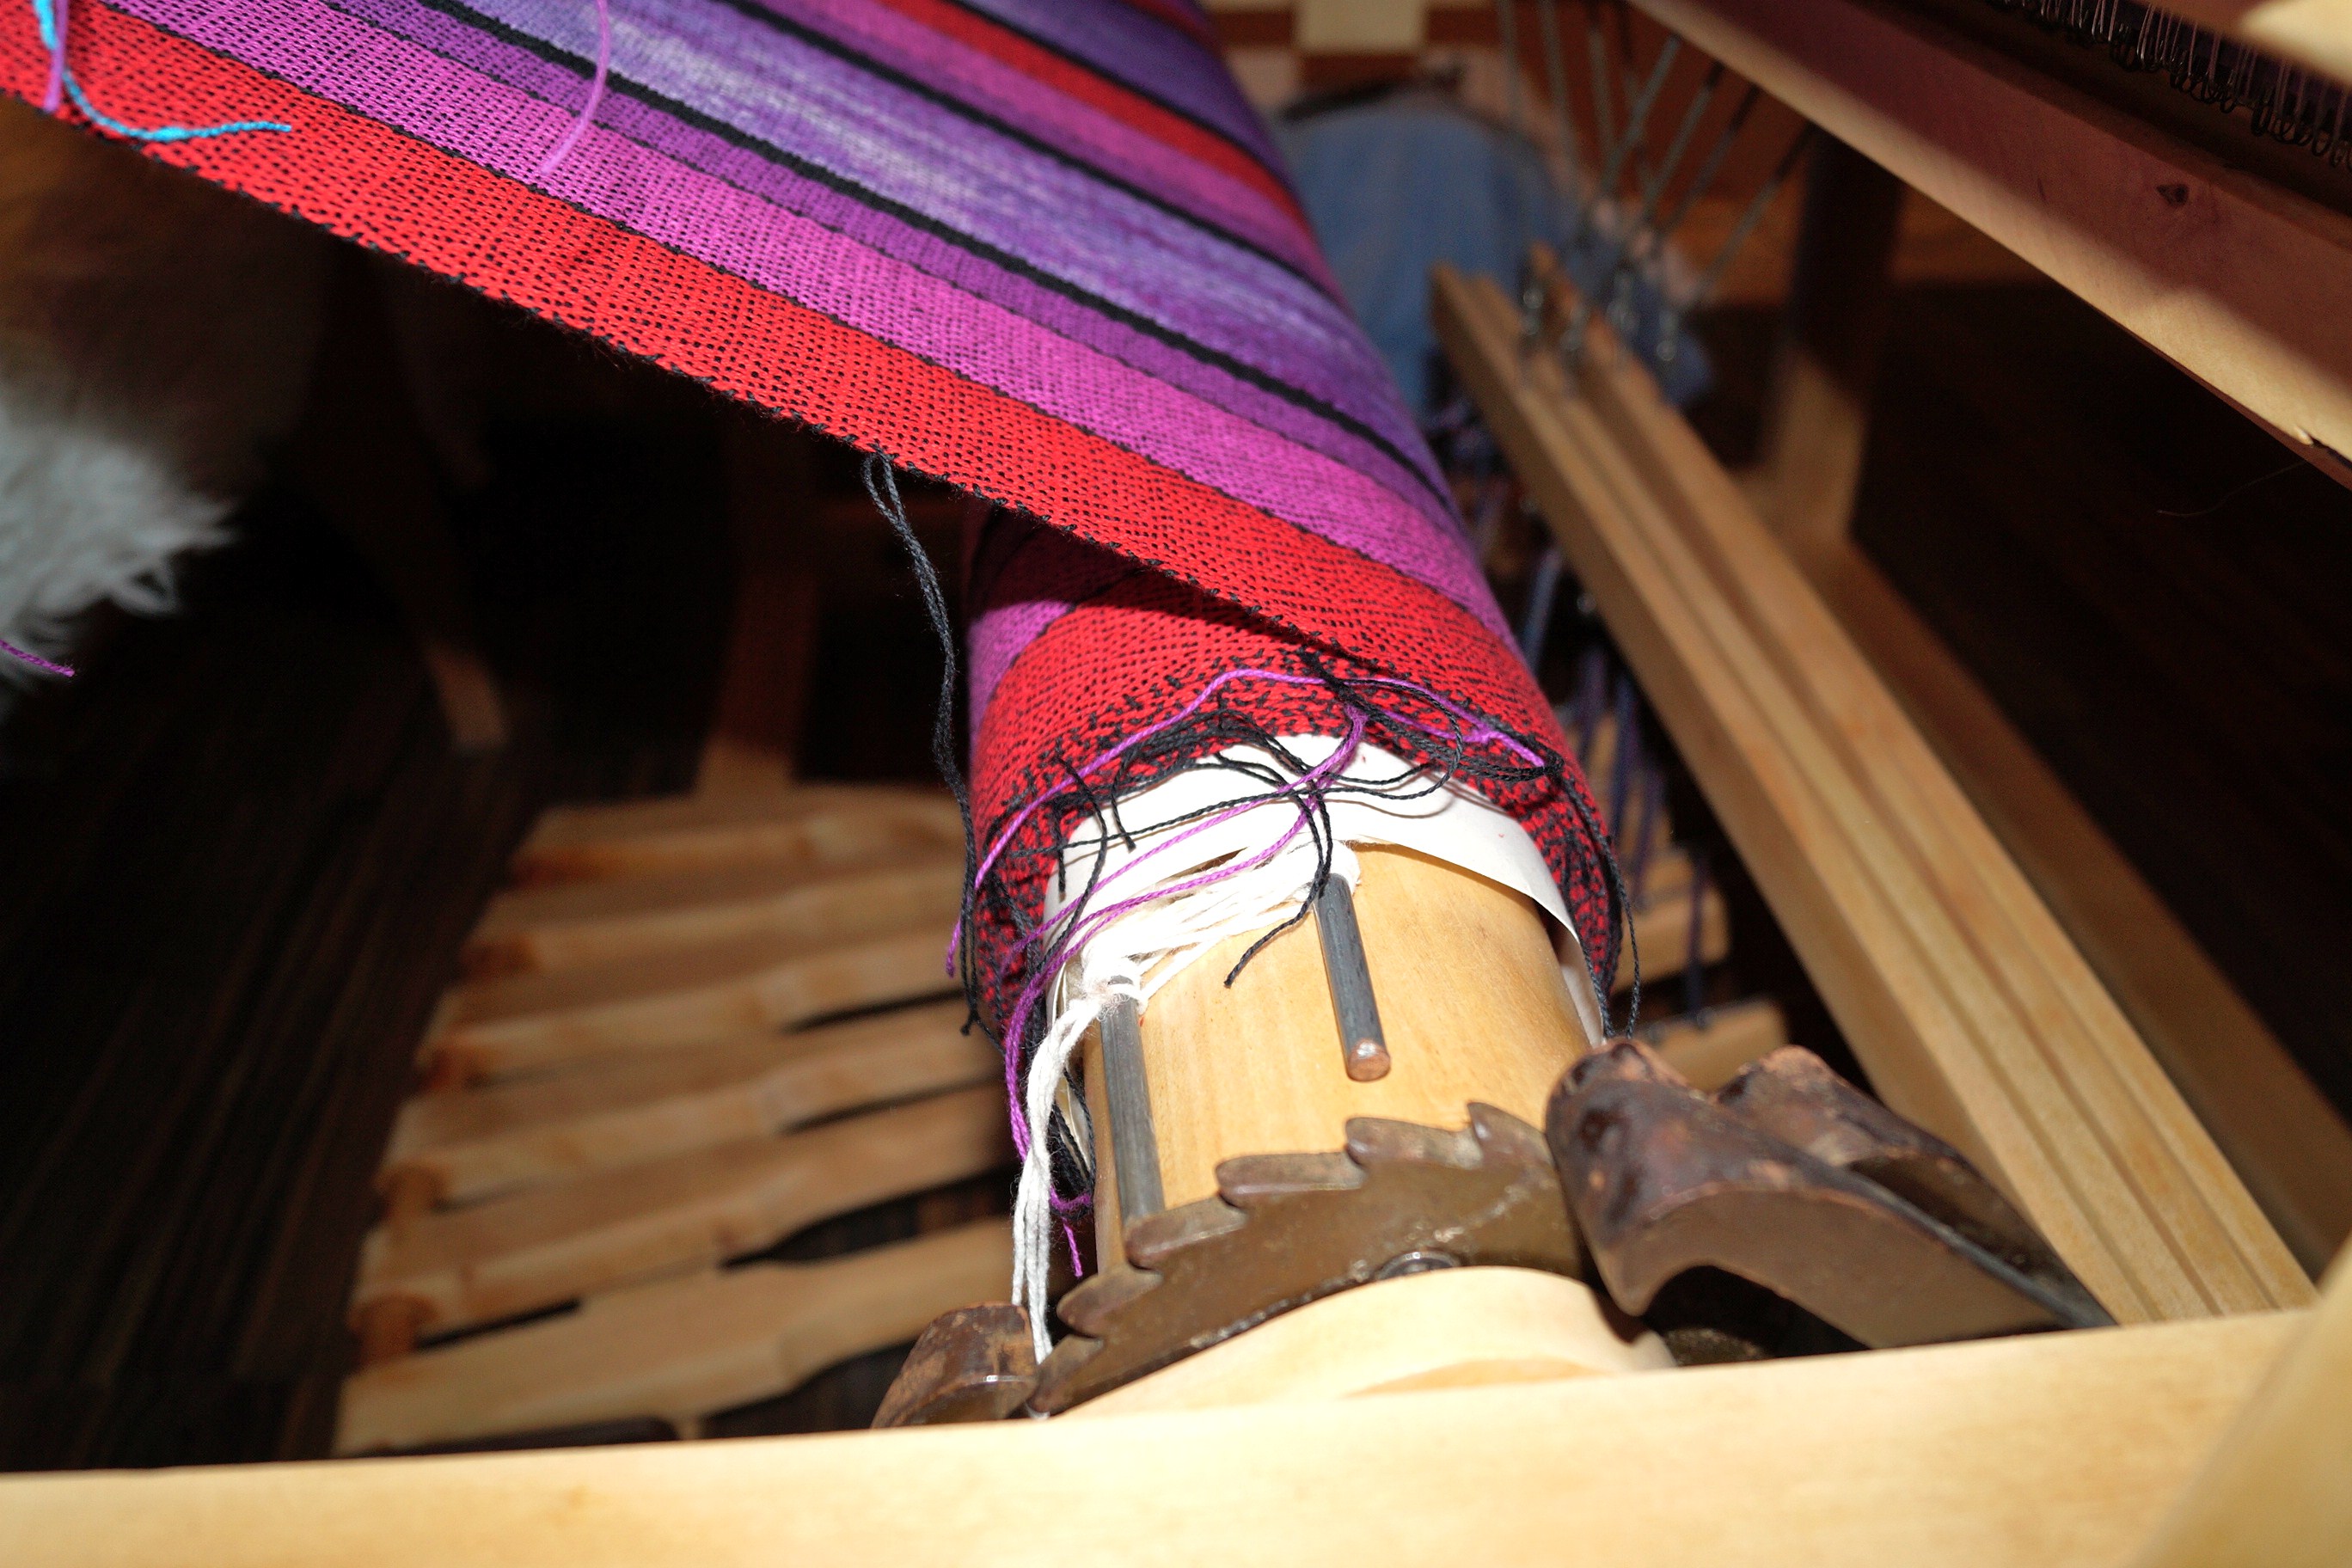
After I wound the commercial coloured yarns, about 4 hours of threading commenced. Warping a loom is very, very time consuming. From start to finish, from winding the warp to getting the loom threaded and tied onto the loom is about 8 hours, depending how wide your project is. This one is the full width of my loom (45″) so was at the top end of time needed to get done. Once on the loom though, weaving goes fairly fast.
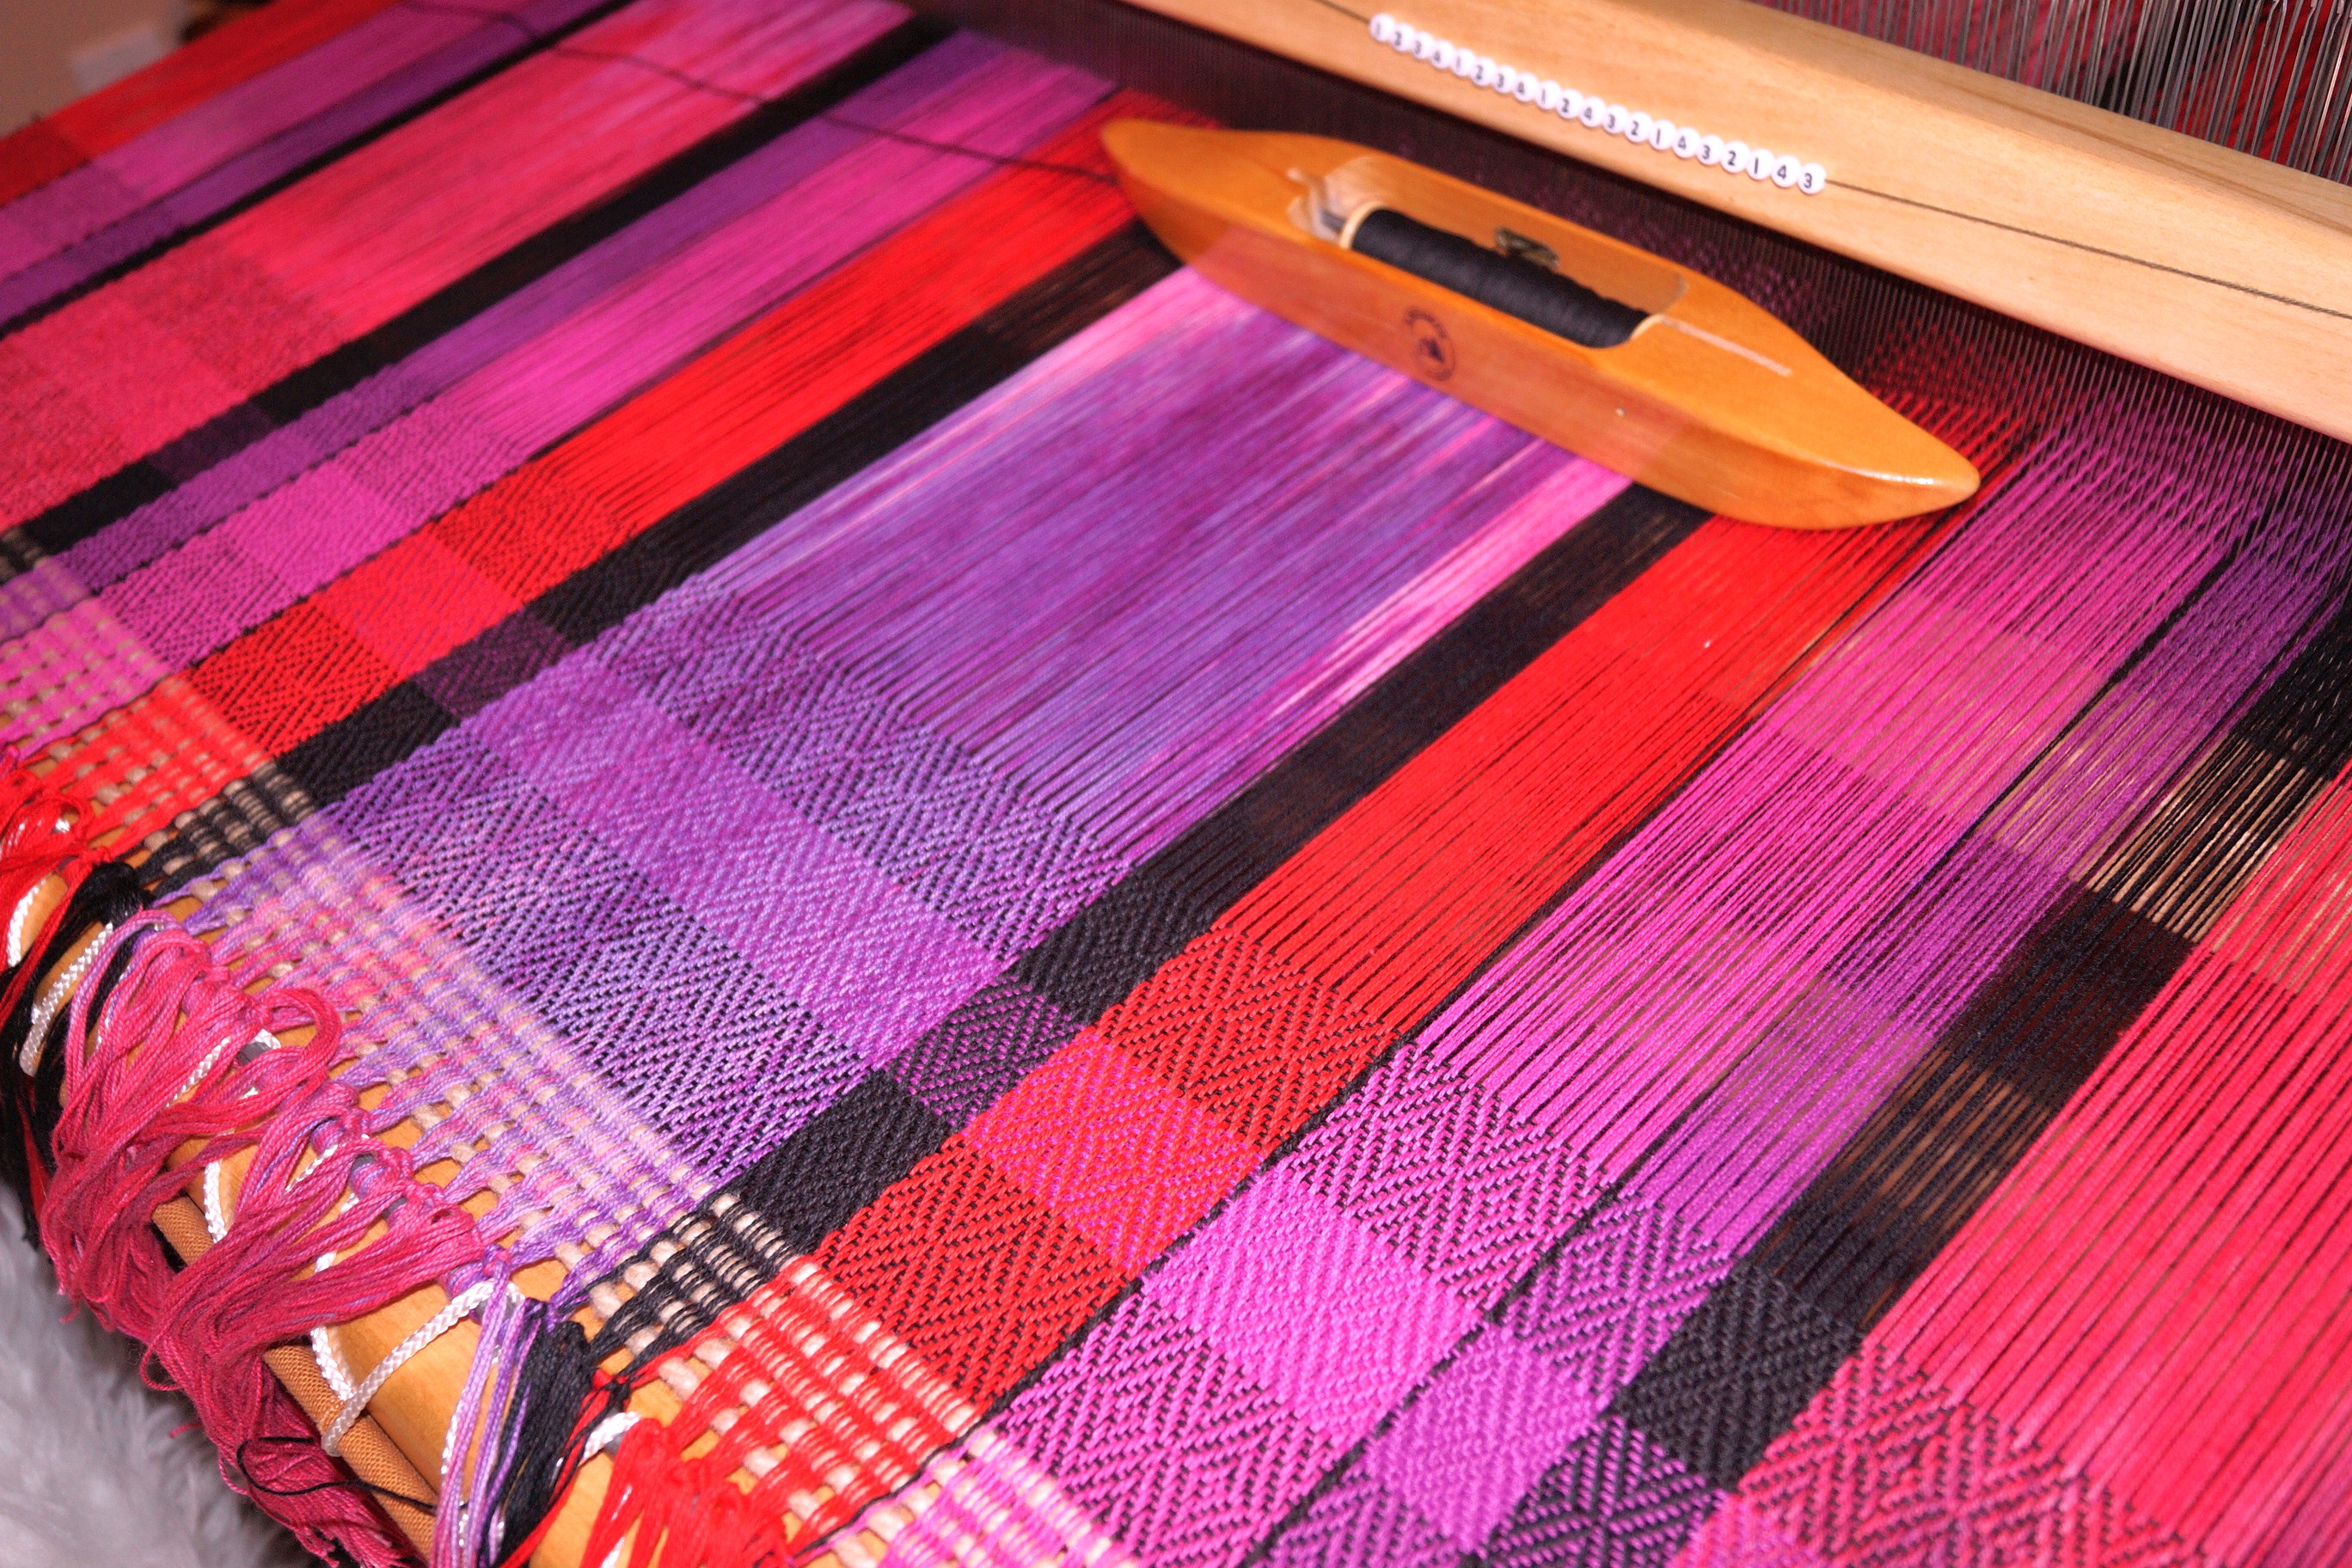
I started with black for weft, then changed to purple to see how I liked the colour interaction. I didn’t. The twill pattern was getting lost against all colours of the warp. So back to using black. I wove just over 6 yards of material. Which took me about 6 weeks, mainly because of work and other life obligations.
Here is the roll of fabric building up on the front beam. Ask any weaver and there is nothing as pretty as a fat roll of fabric to look at.
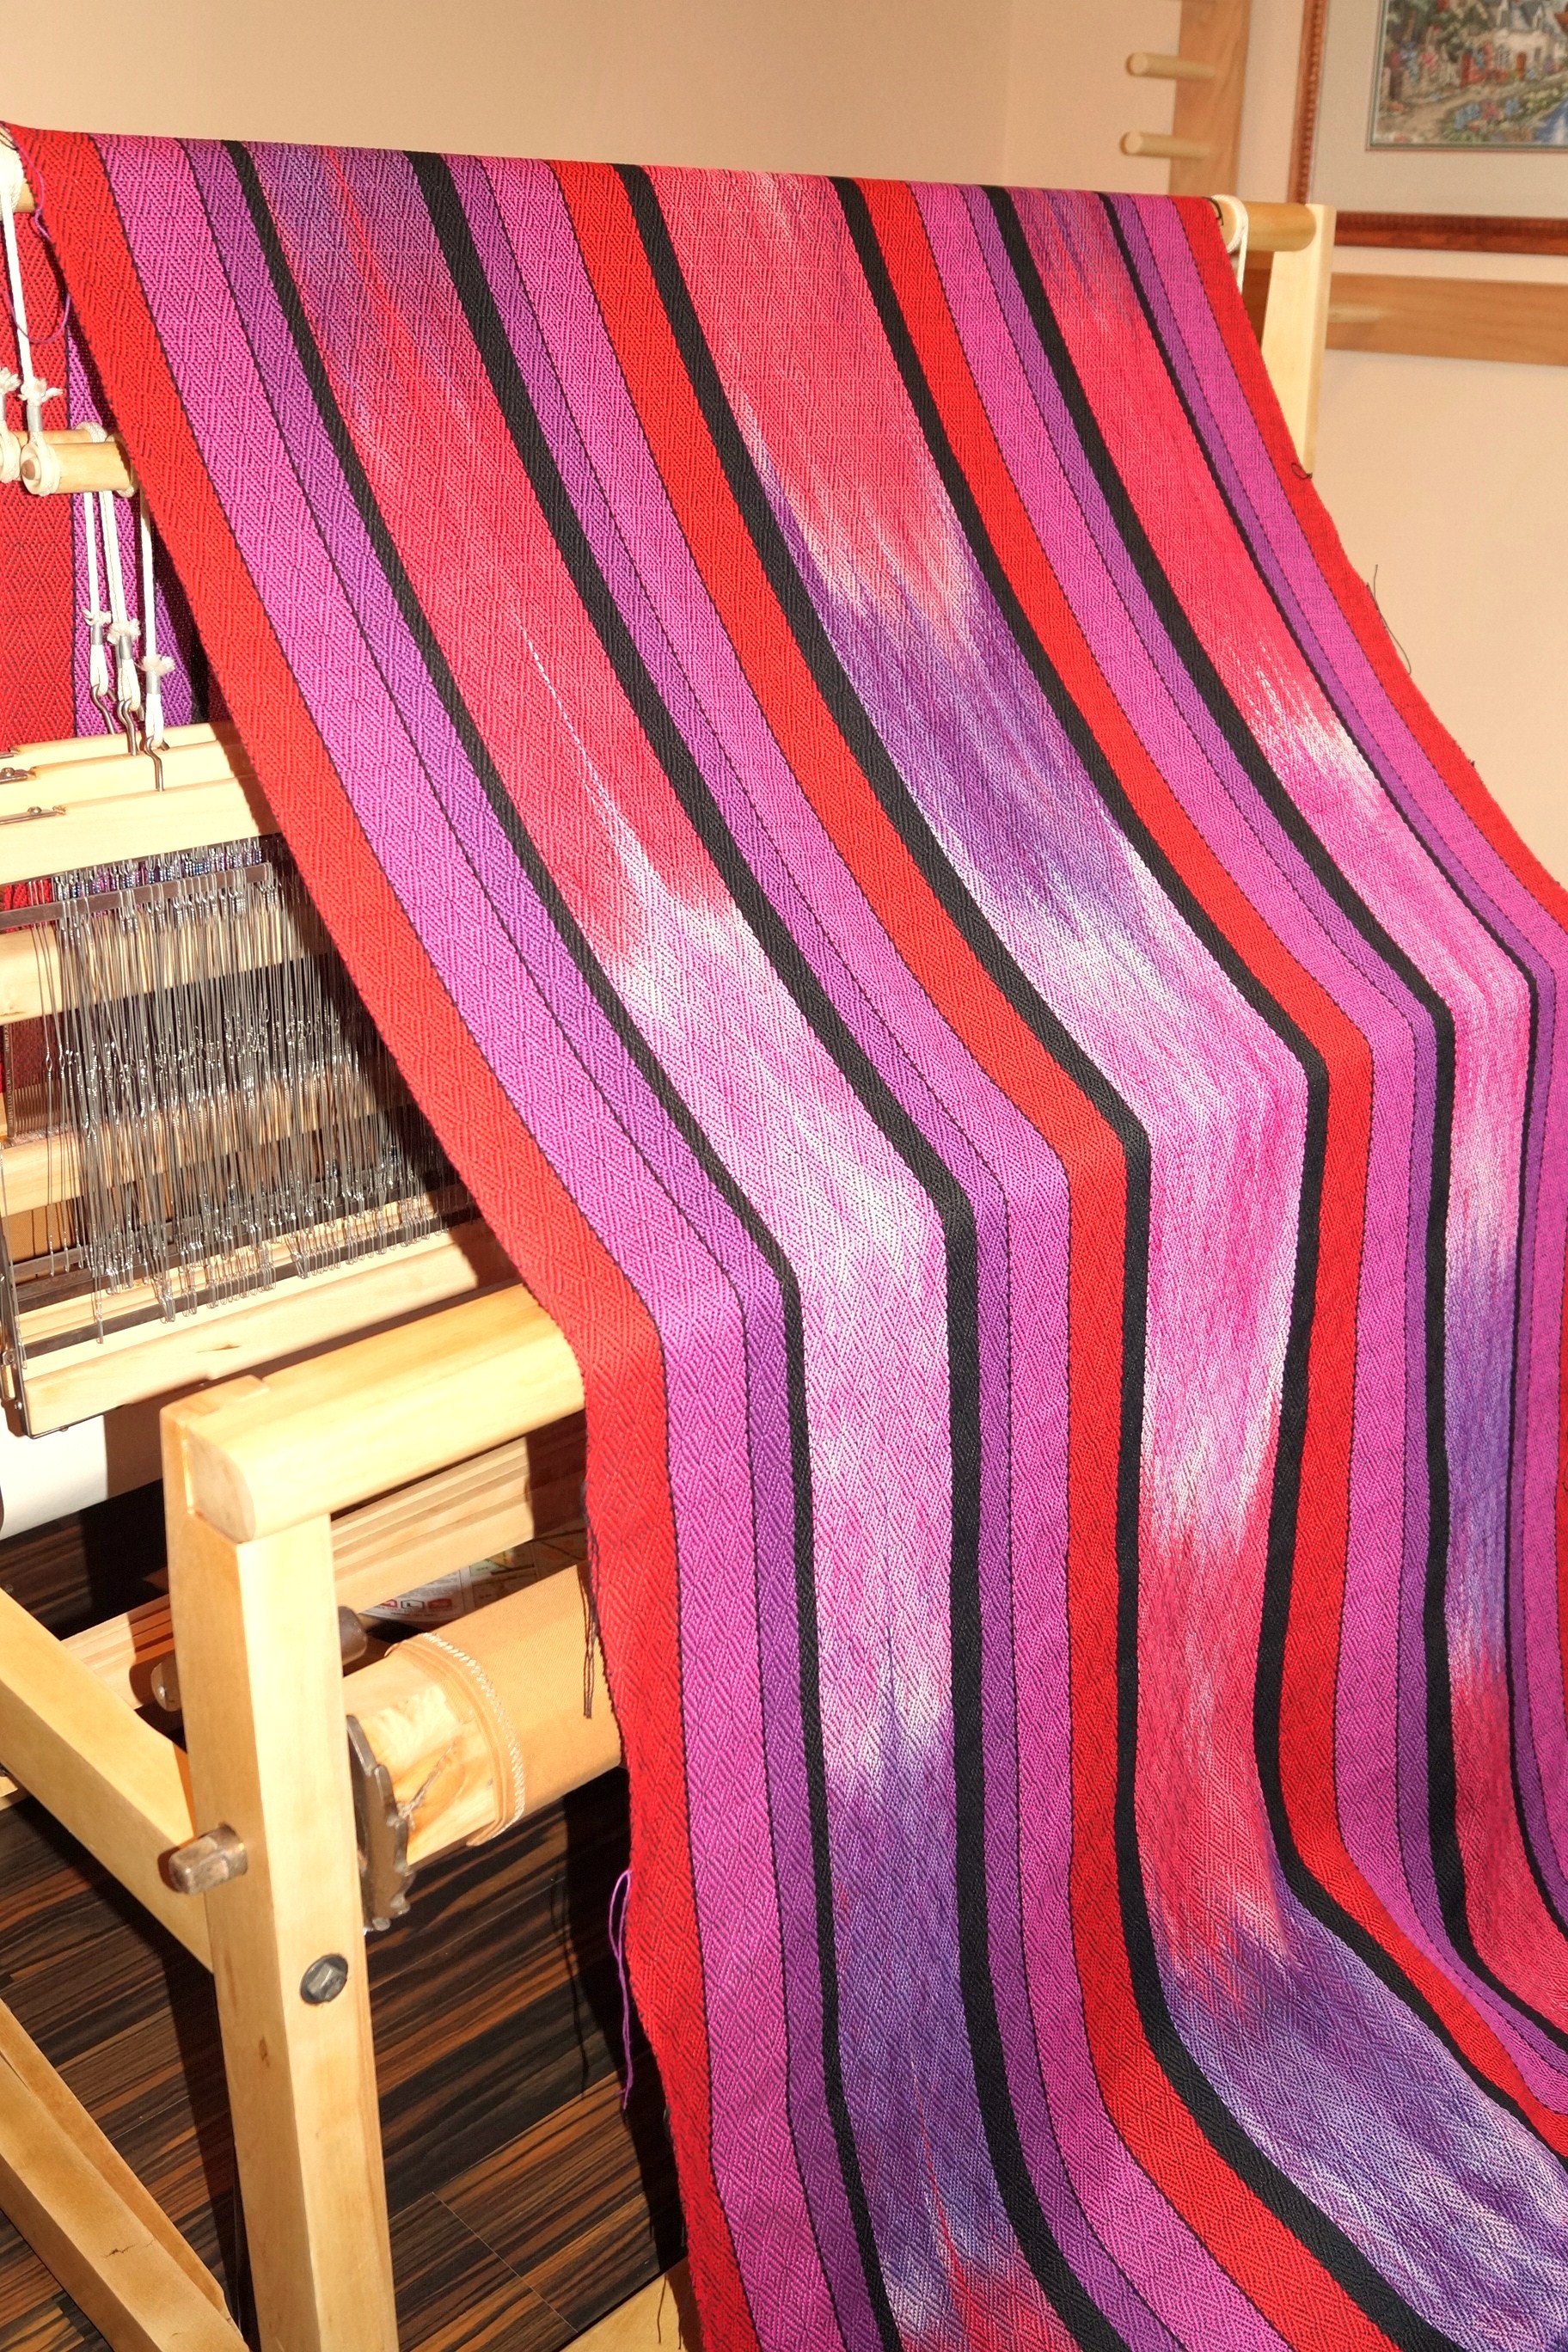
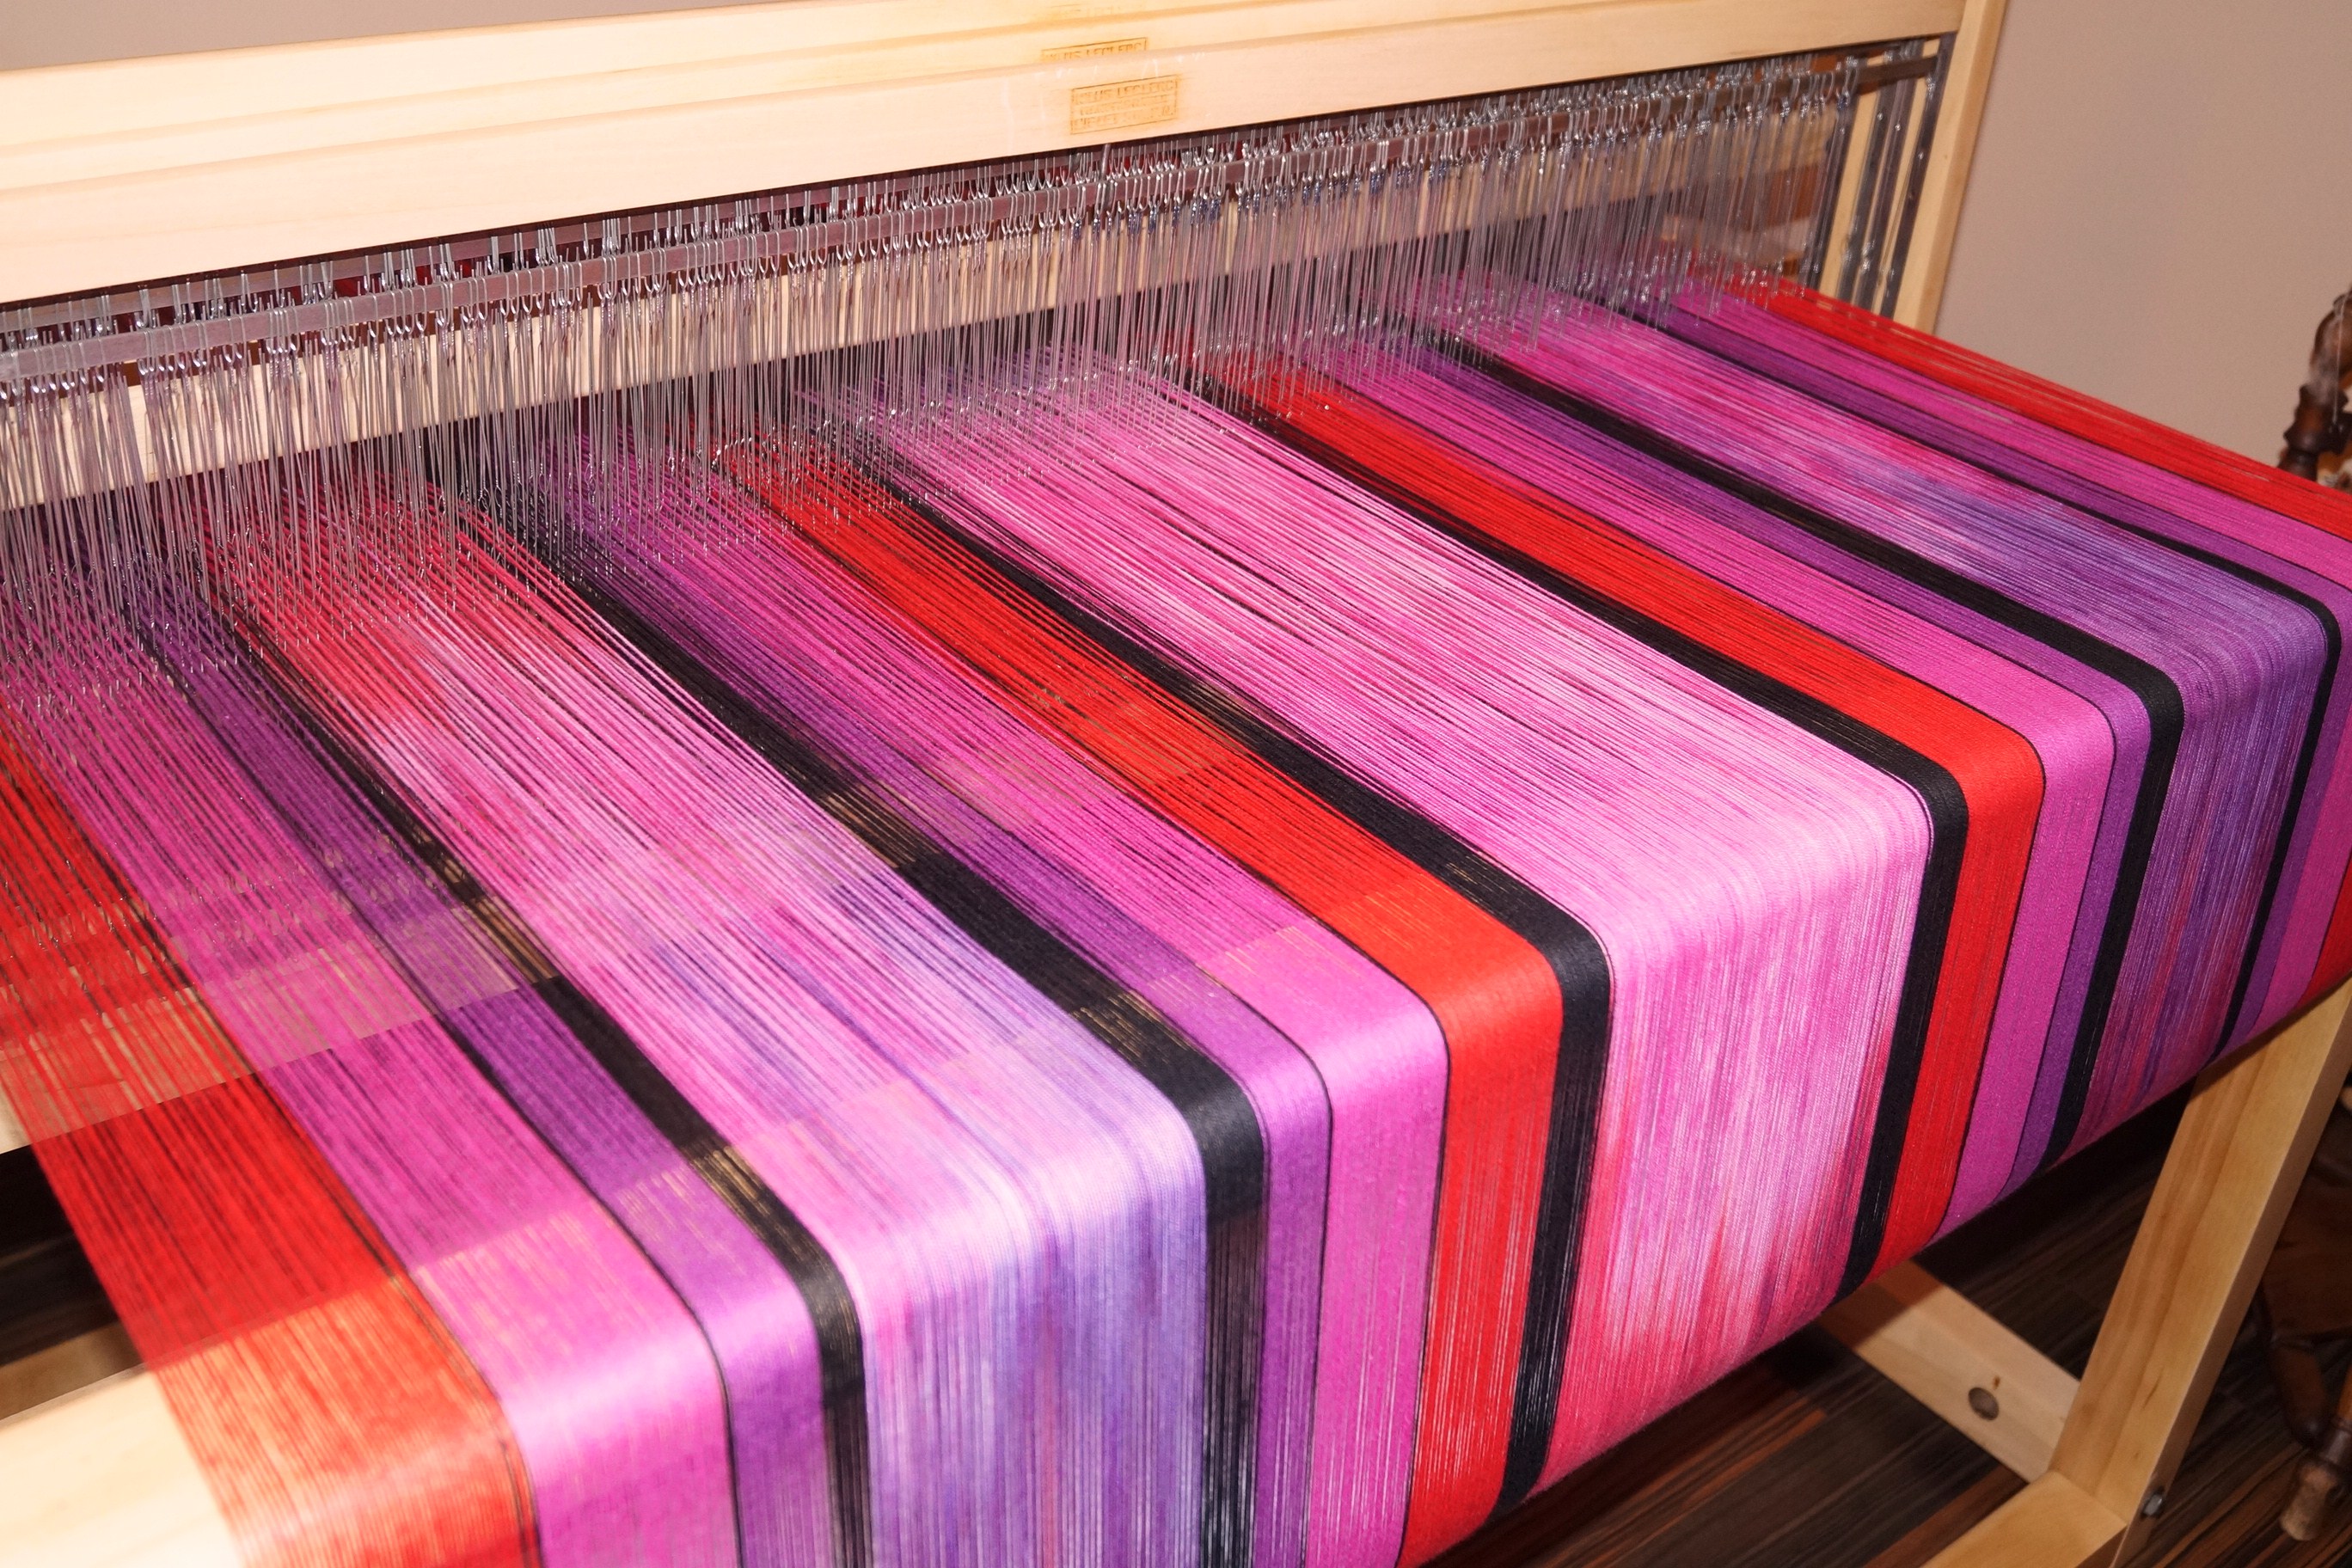
Here it is pulled off the loom, what a gorgeous sight!
Once the fabric was done, it was washed, dried and put away until I could find some time to sew the travel bags, which actually took just over a year later to accomplish mainly due to life plus I wasn’t happy with any of the luggage bag patterns I had seen to date.
I also needed to weave the straps that would be the handles on the luggage. I bristled at the thought of using commercial webbing for the straps. So I bought some matching colours of a thicker cotton yarn and warped my Inkle loom to make the straps. I wove 3 altogether, 2 for the main luggage bag and one for the laptop carrying messenger bag.
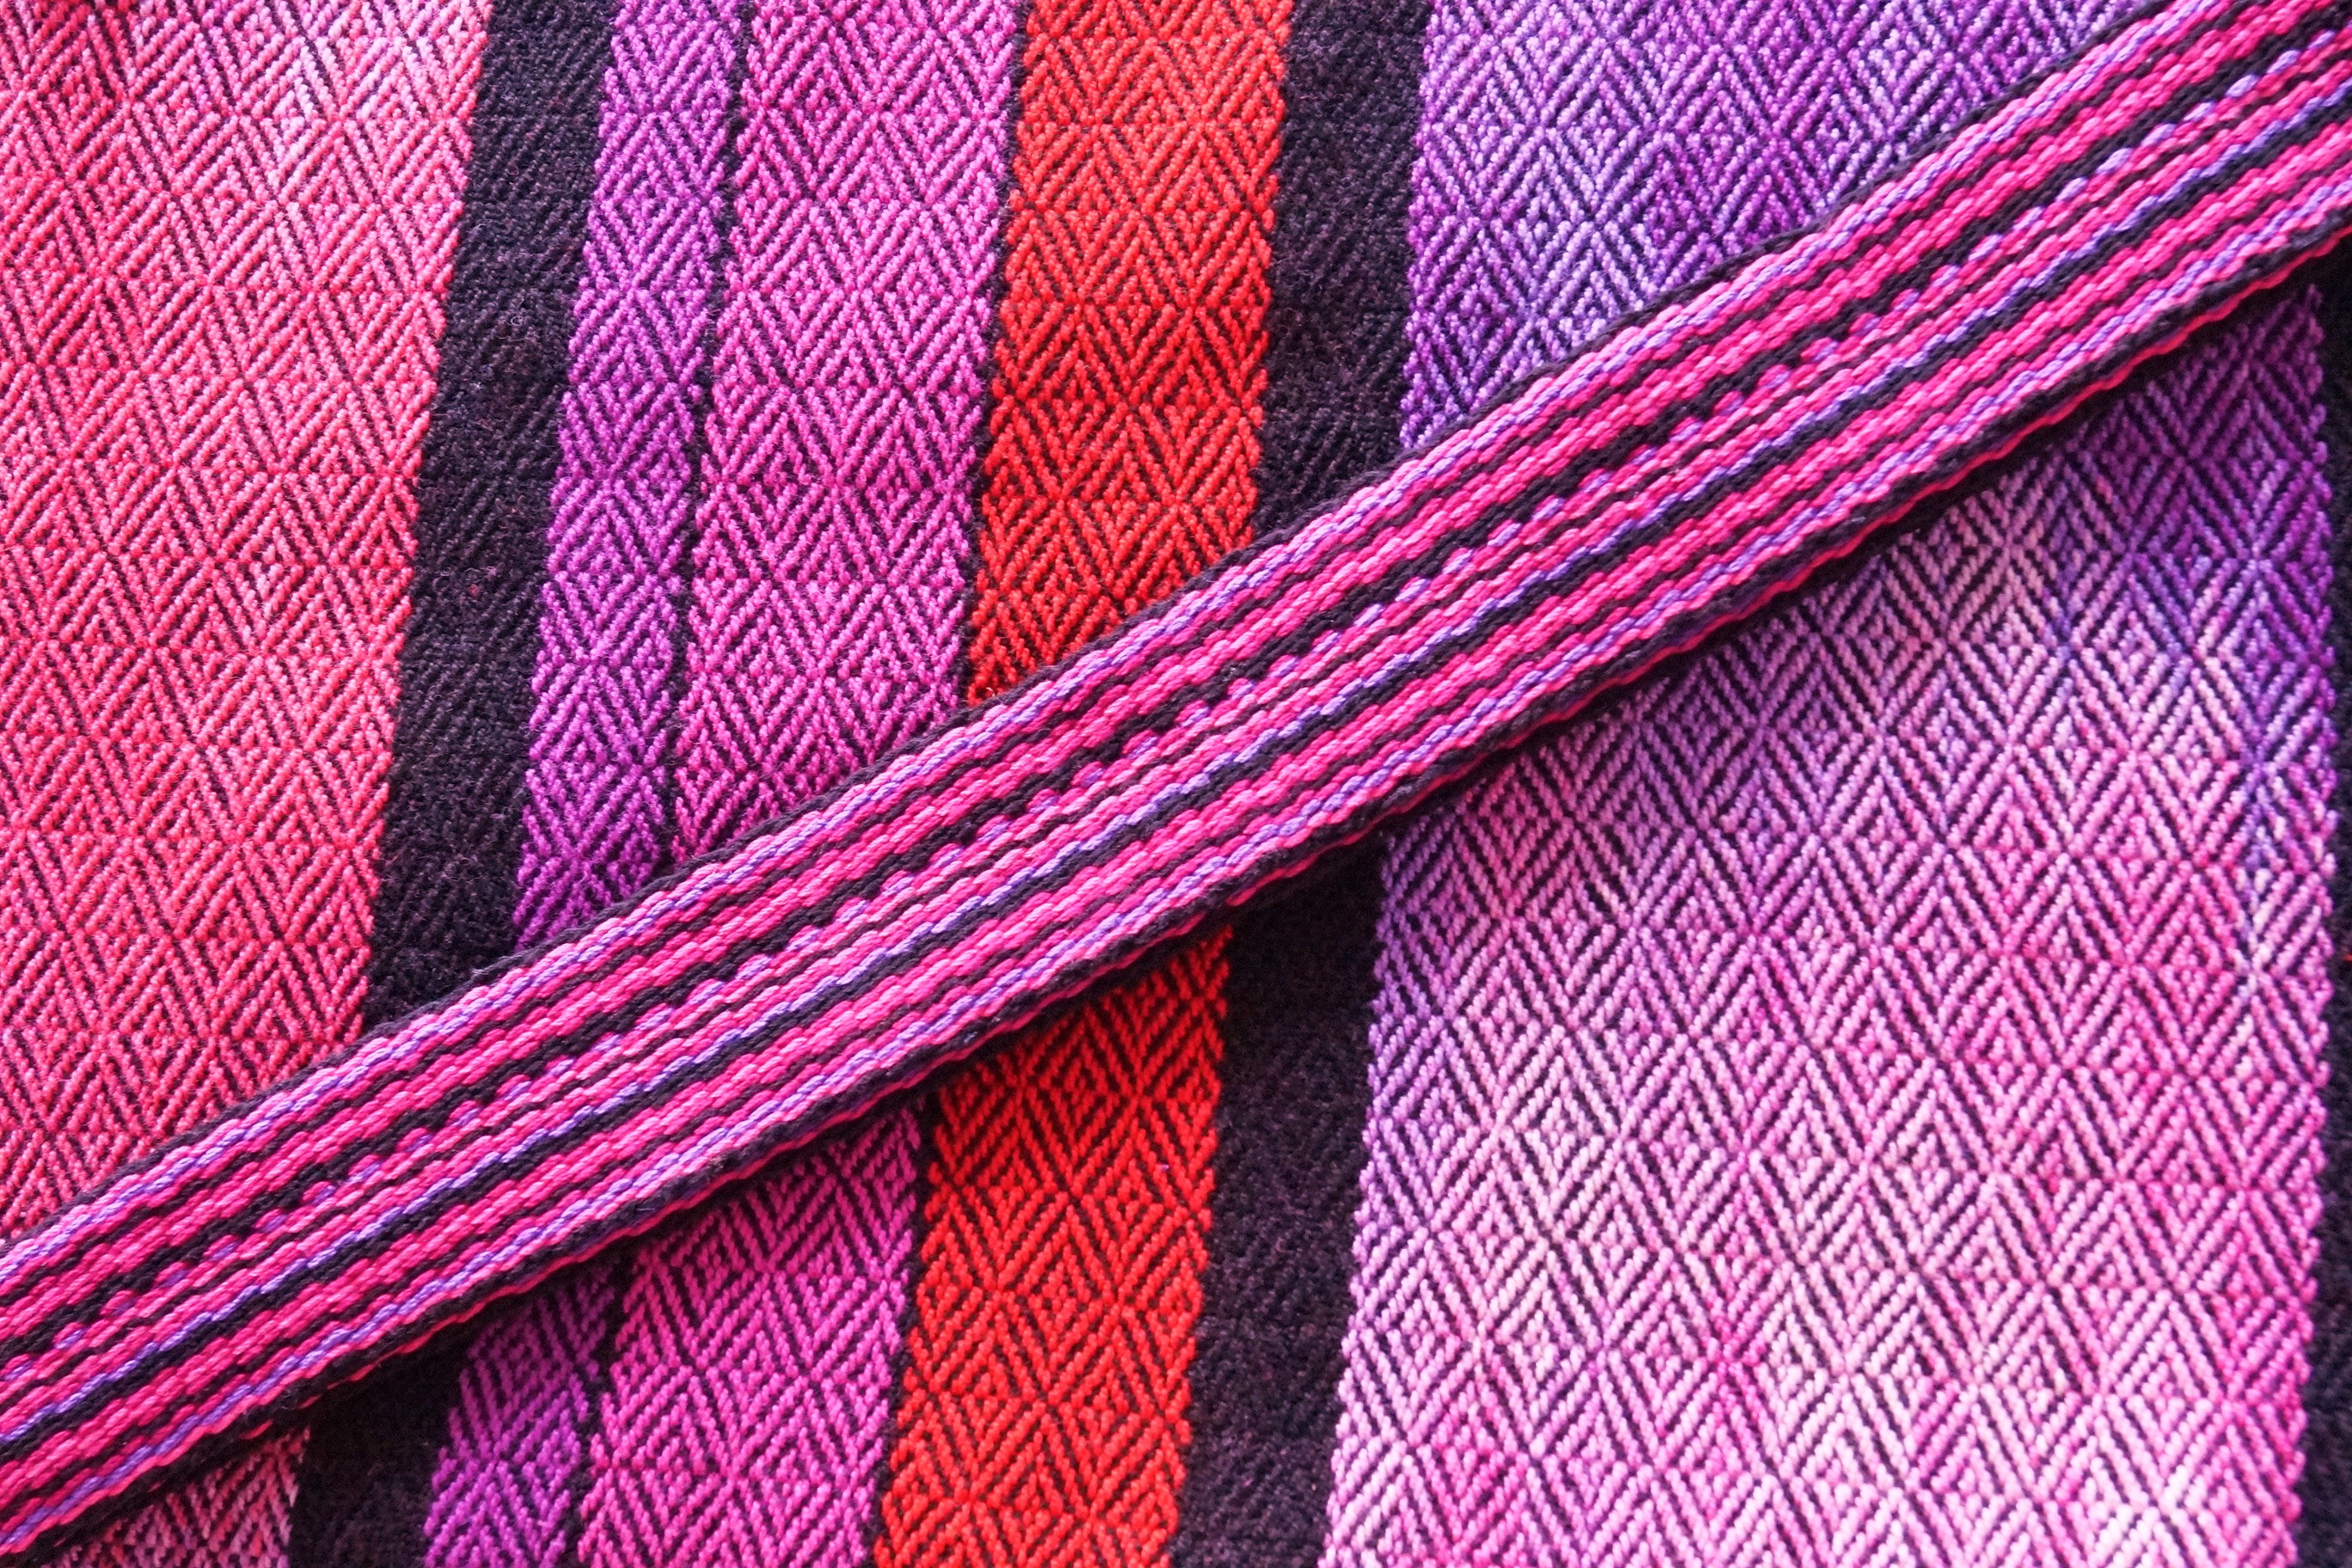
Here is one of the straps against the fabric, a pretty darn good match!
Fast forward to late May 2018 and I finally had gathered everything I needed for the bags; zippers, thread, D-rings for the handles, lining fabric and a really neat iron on padding material called In-R-Form (not sold in Canada, had to order from the U.S.) that makes fabric stiff, but padded as well. Great for laptops bags.
I brought pretty much every piece of equipment and my notion organizers up to the homestead and got to work sewing. After 3 days (on/off), the main travel duffel bag was complete and literally, after I finished the very last seam, my machine broke down. It needed servicing so off it went to get fixed. A week later I was back in business. Meanwhile I finally found a great messenger bag pattern off Pinterest as well as a cute box bag style toiletry case and after another couple days…voila! All were finished!
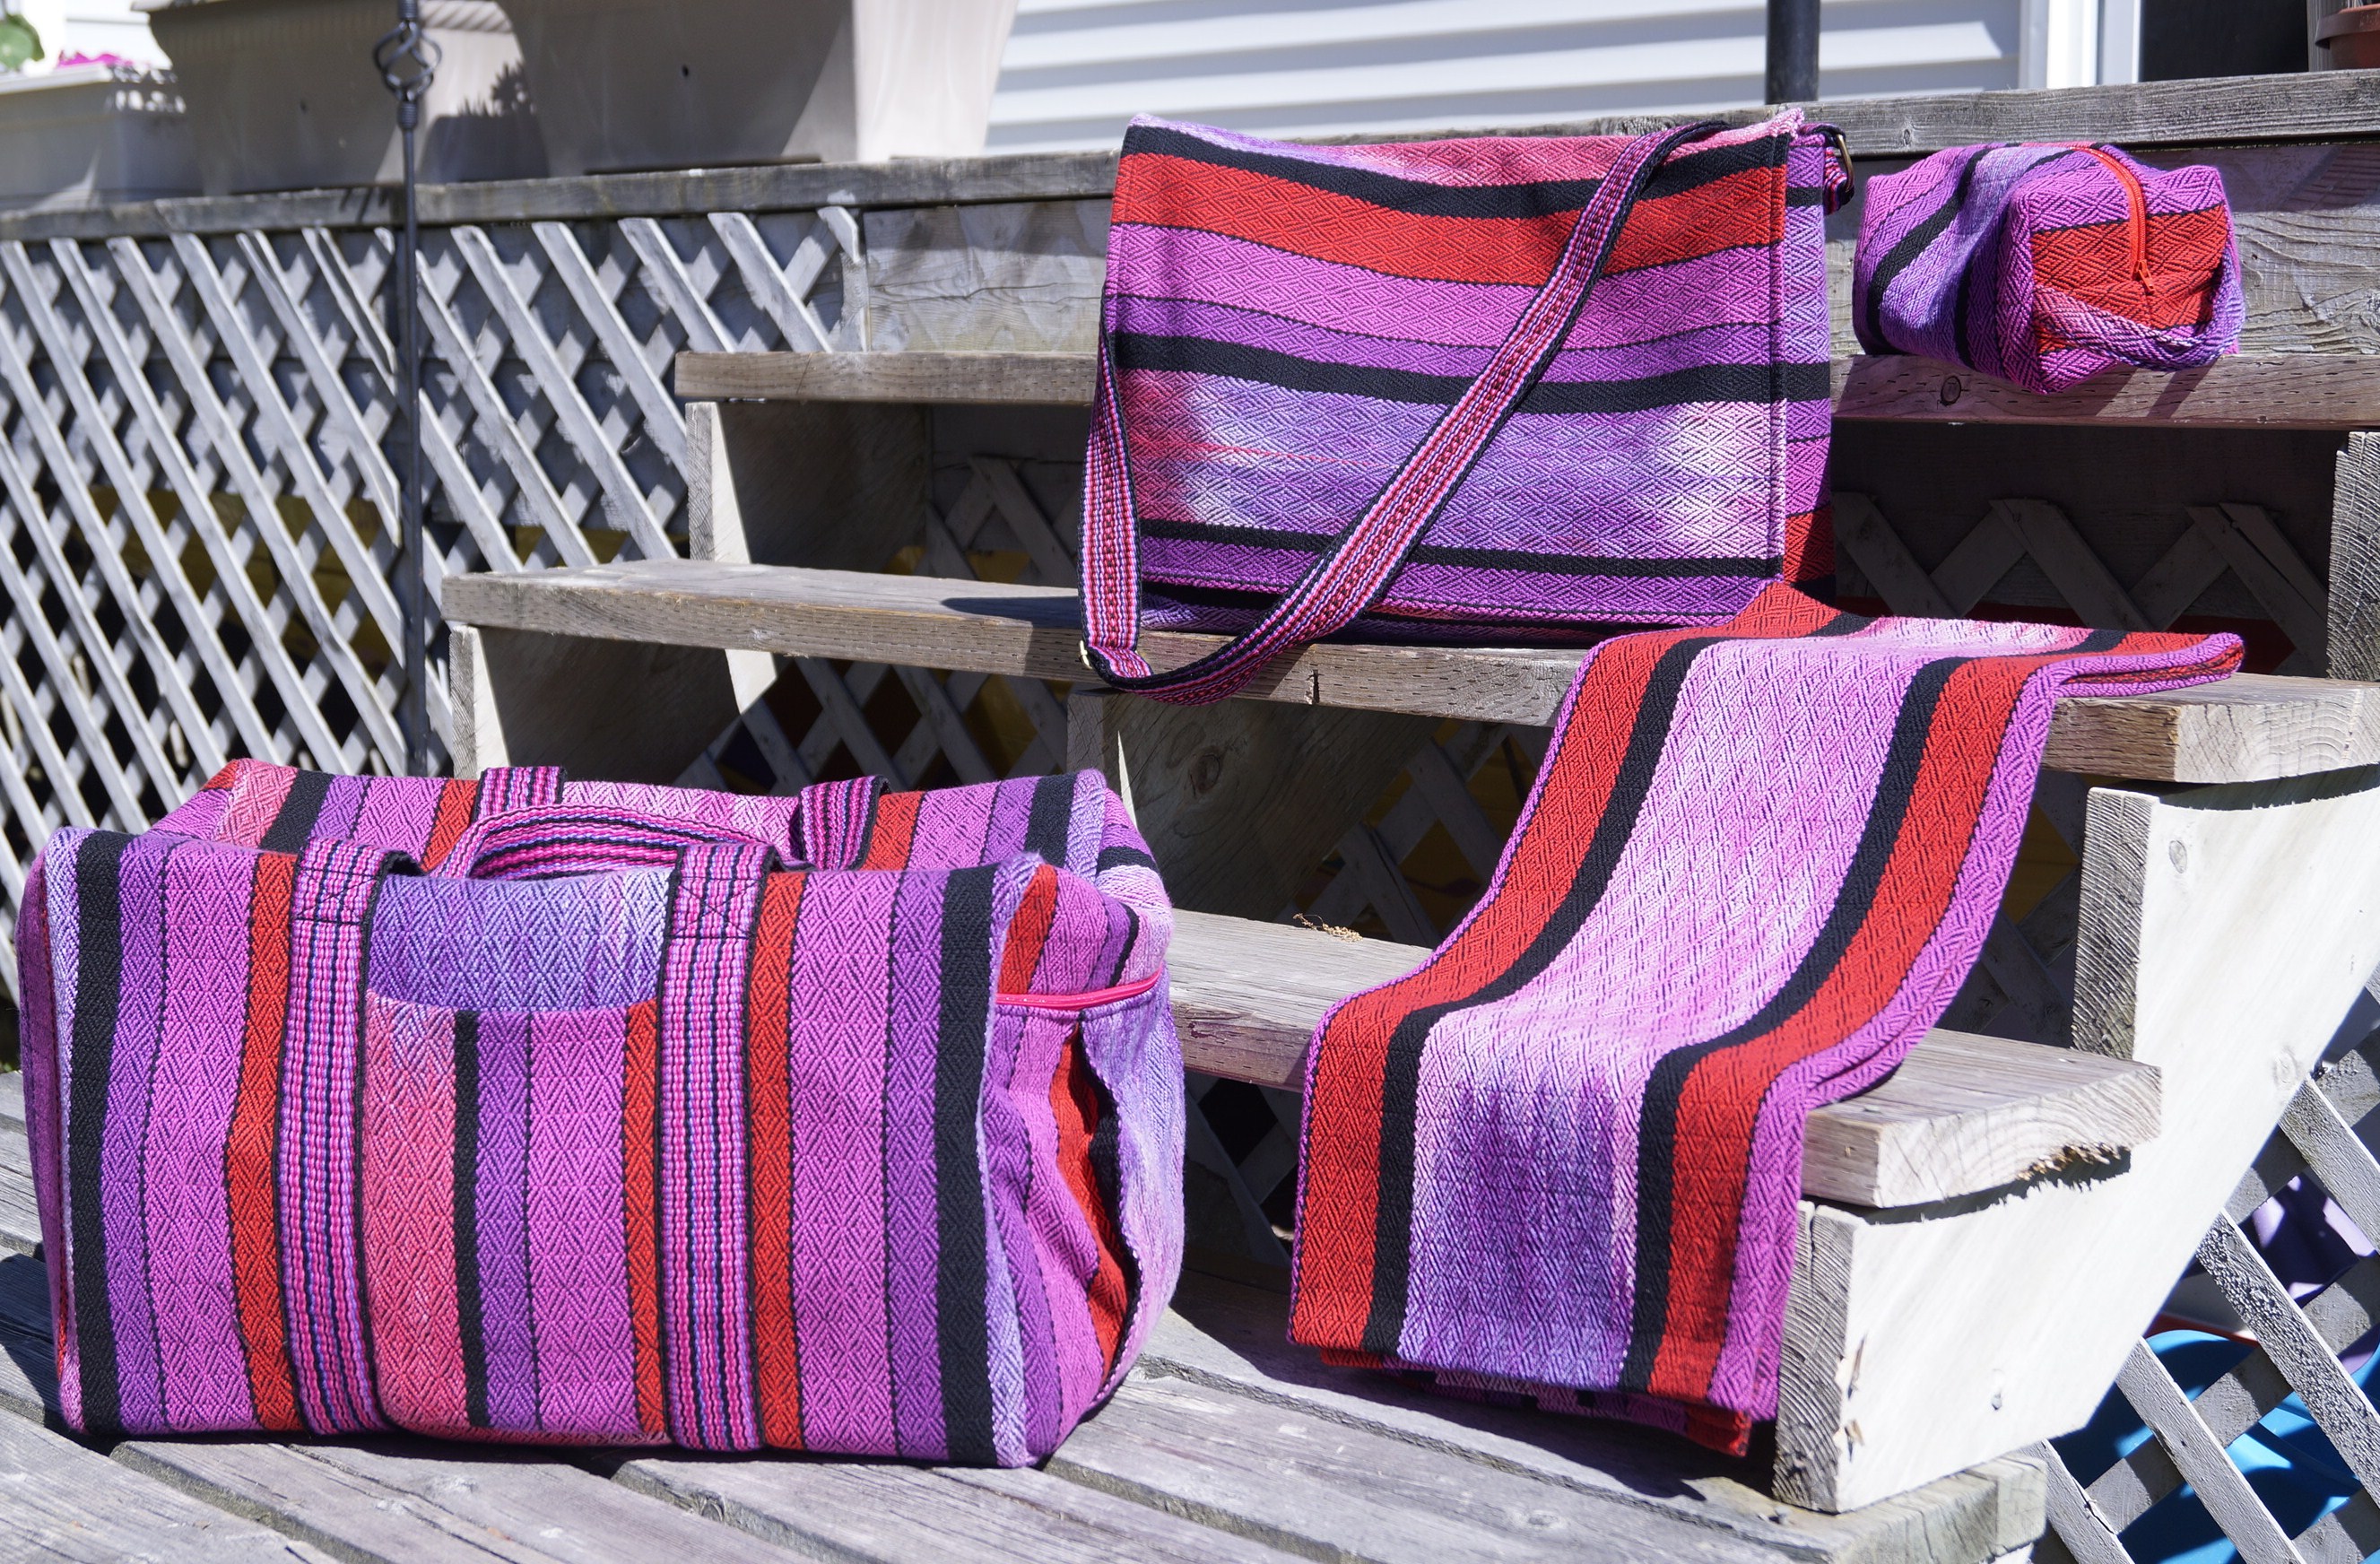
I had enough material left over for a generous “bath sheet” size towel. Being 100% cotton, it can be used as either a beach towel or a throw to cover up in.
2 years of planning, weaving and sewing has finally come to an end and I just love the results! By the way, you should have been able to figure out why I called it my “Piñata” travel bag project 😉
Deborah
Deborah, I did not realize you had all 3 pieces finished! It is so cool rhat you have the extra for a towel. You are going to be traveling in style! Your travel set has become one of my favorite handwoven projects.
Theresa
Thanks Theresa! Yes, took me some time and I am thrilled with the results!! 🙂