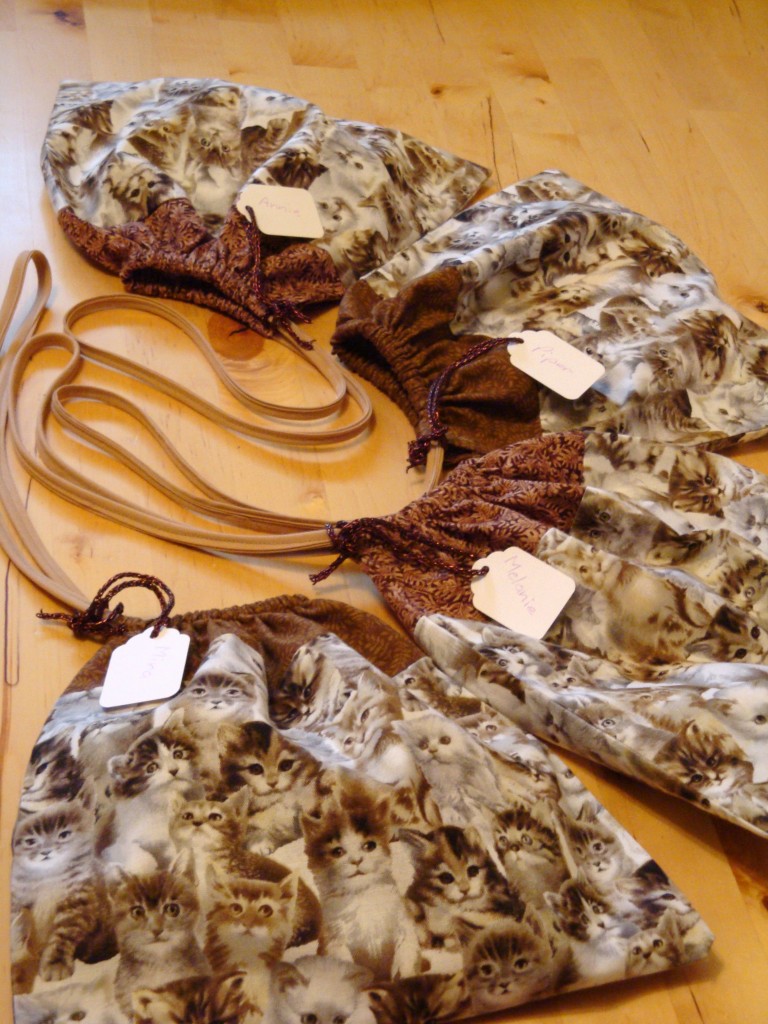
For those that like to sew and have a mountain of leftover fabric crammed into their sewing room, this project is for you.
Even though my kids are grown and gone, every so often I need a gift/loot bag and I detest having to spend money on cheap, dollar store bags. I also prefer to personalize my gifts and/or wrappings to the giftees. That way they remember what I gave them and I get more recognition than what other people brought – well, at least that is my reasoning….ok…just kidding on the last part…but they are unique!
These gift bags are super easy to put together with minimal materials. As I mentioned above, if you are already a sewer, then chances are you have the materials in your home already to use. If not, they are cheap to obtain and you don’t need much. Skill level is pretty basic too, you don’t need to be a tailor or pro seamstress to make them, if you can sew a straight line – then you can make one of these.
Materials: (to make one bag, finished size is 9 1/2″ H x 10″ W)
Main Bag – Fabric A: 1 Quilter’s Fat Quarter Square (22″ x 18″)
Bag Casing – Contrasting Fabric B: 1 Quilter’s Fat Quarter Square
30″ length of decorative cord for drawstring, no wider than 1/4″ (I actually used 1/2″ wide Double Fold Bias Tape, folded in half lengthwise and stitched, it makes for a very sturdy drawstring)
Matching thread
Directions:
All Seams are 1/2″ unless otherwise noted.
Cut two pieces of Main Fabric A 11″ wide x 8″ tall
Cut one piece of Contrast Fabric B on fold (fold fat quarter in half lengthwise) 10 1/2″ x 4″
Step 1:
Open out Bag Casing and press under 1/4″ along each upper side edge, for approx. 1 1/2″. Fold over again another 1/4″; stitch close to fold along the length of the folded area (approx. 1 1/2″).
Fold under 1/2″ along long top edge of Bag Casing; press. Fold over again another 1/2″; press. This forms the drawstring casing. Stitch close to lower edge of second fold along length of casing.
Step 2:
Wrong sides together, stitch one side seam of Main Bag. Trim/finish seam; press seam open.
Step 3:
Wrong sides together, pin lower edge of Casing to top of Main Bag; stitch. Trim/finish seam and press seam towards Main Bag.
Step 4:
Fold bag in half, wrong sides together, stitch lower edge and up remaining side to within 1/2″ from top, keeping the top side edge of casing free for drawstring. Trim/finish lower and side seams, turn bag right side out; press.
Step 5:
Pull drawstring/cord through casing, overlap ends and stitch securely. Feed the stitched ends along the casing until they are on the opposite side of the casing opening.
Finito! You can follow the above directions and make the bags whatever size you need using whatever fabric you have on hand. These work well for all Craft/Quilter’s cotton, not really suitable for thicker fabrics and denims.
Once you present your present (don’t you just love words that are the same but mean 2 or more different things?) then get ready to receive tons of accolades on your sewing talents!

