
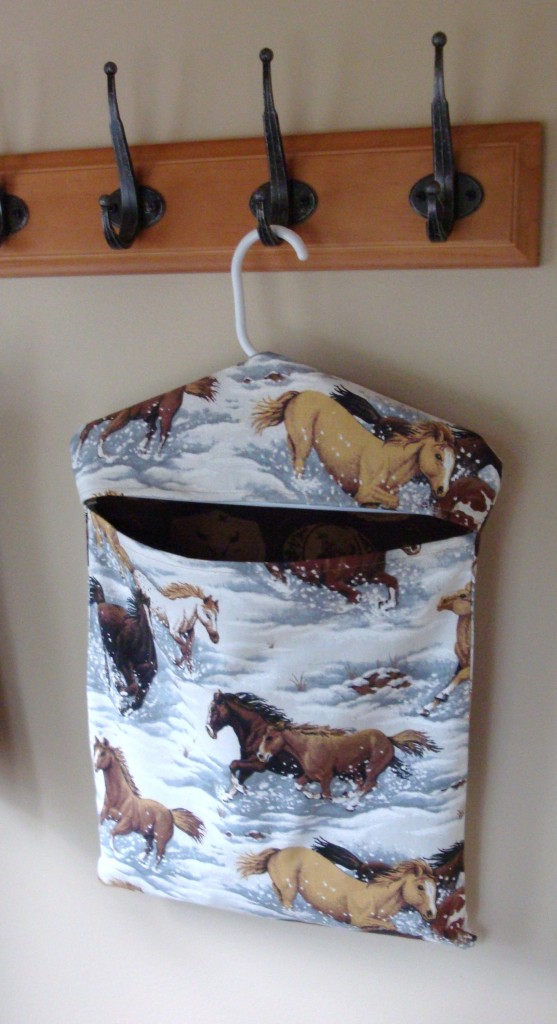
Outdoor Clotheslines are on a major comeback with the cost of energy on the rise as well as Time Of Use pricing making it’s way into our homes and lives. I myself have a clothesline and I am sure plenty of others are moving to this cost effective mode of drying clothes. Remember those old, vinyl clothespin bags your mother and grandmother had? The kind that once they dried up due to overexposure to the sun, they split and had to be duct-taped back up so all the pins wouldn’t fall out?…well, my new style of clothespin bags are made of durable fabric and can hang outside whatever the weather.
They can be made in pretty much any fabric colour choice to suit a variety of tastes, and are quite simple to put together.
Materials
Start with 2 contrasting choices of fabric, one for the outside and one for the inside. Suggested fabrics to use are decorator fabrics, sunbrella fabrics or even quilting fabrics. You will need 2 squares of each fabric choice measuring 13″ x 19″, as well as 2 small strips of contrast fabric measuring 13″ long by 1 1/2″ wide (for binding strips)
2 Sheets of Iron-On Adhesive (available in Fabric Stores) cut to 13″ x 19″
Children’s Size Plastic Hanger
Fabric marker
Directions
Attach Iron-On Adhesive (following package instructions) to the wrong side of each outer piece. Peel off backing and place the inner fabric (so that wrong sides are together) over the adhesive and iron securely. You should now have 2 pieces of fabric glued together (wrong sides together), and have to finished sections, one for the front and one for the back.
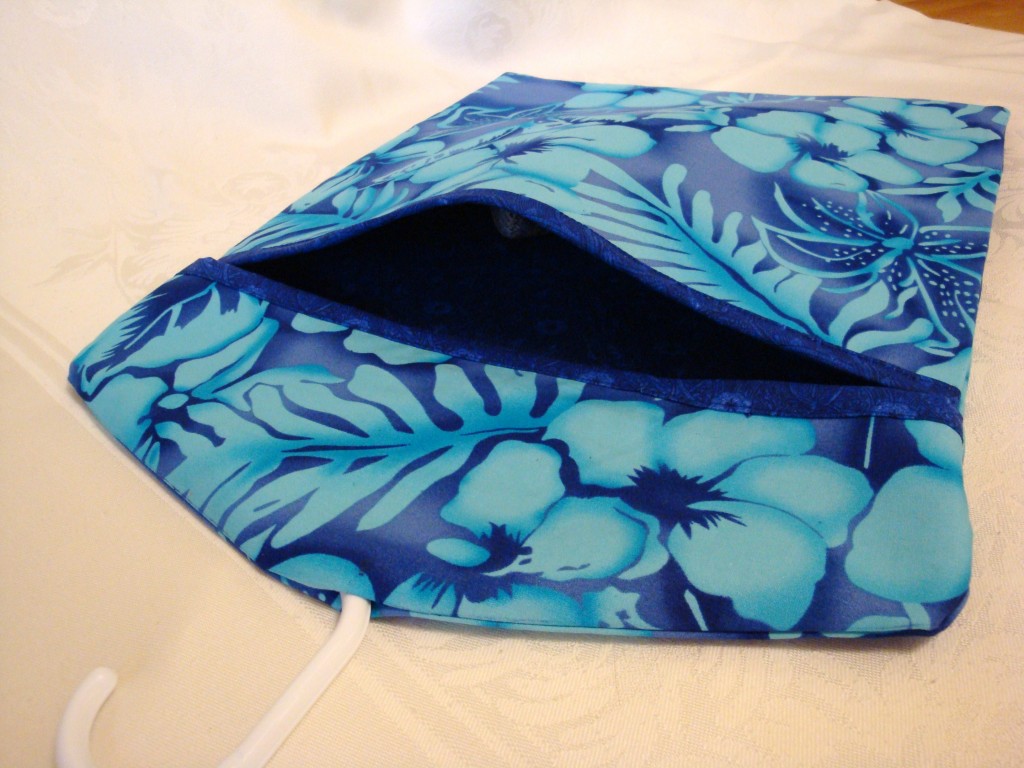
On the wrong side (interior side) of the front piece, lay the plastic hanger on the fabric at the top (13″ width side) and trace the outline of the top of the hanger down and out towards the sides, stopping 1/2″ from the edge. Remember to start at the top of where the hanger handle is making sure to leave an appropriate amount of space for where the handle will fit through. Then measure 1″ down from the bottom of the hanger in a straight line across the fabric.
Cut across this line (doing it only to the front fabric, this will be the opening for the clothespins).
Take your strips of fabric and fold in half, lengthwise, press. Open out and fold the outer (long) edges so that they meet the pressed seam in the middle. Do this to both pieces.
Open out the seam again and pin (right sides together) to the edges of where you cut the front piece in two. Sew a 3/8th’s seam along the length of the strip to the front of the bag. Do this to both sections. Now fold the strip over the outer edge of the front bag pieces, making sure to have pressed edges folded under neatly. Topstitch binding in place.
Take the small front piece and place it against the back piece of the clothespin bag (exterior fabric together), lining up your edges at the top. Sew along the lines you traced of the hanger, again, making sure you leave the top opening large enough for the handle to fit through. Trim seams at top.
Place the lower piece (exterior fabric together) to the back piece, lining up the binded strip openings, pin. Sew down both sides and across the bottom in a 1/2″ seam. Trim seam, turn right side out and press.
Insert hanger at top and fill with clothespins and you are all ready to go!
I have been using mine on a regular basis, it is so handy. When not in use, I hang it in the closet by the door, no more spilled clothes pins to pick up. BUT I left the bag on the line one day the wind picked up and the hanger broke. I replaced the hanger with a wire one. A bit of bending, duct tape and a pair of pliers and it is now industrial strength:D